
So you want to start producing music at home? Great! Home production (often referred to as ‘Bedroom Production) has exploded in popularity with the advent of accessible and powerful home computers and laptops. It’s a great way to begin your journey as a producer and save a countless amount of money on studio fees. But what essentials do you need to get started? We’ve broken down our top 5 pieces of hardware and software that will get you up and running.
DAW
This is where the magic happens, a DAW (Digital Audio Workstation) is a piece of software that allows you to input, record and edit audio. Almost all DAWs also arrive loaded with instrument presets so you can already begin creating without any other equipment or real life instruments, however these factory presets are often limited and thus many producers opt for recordings of live instruments or sourcing more premium presets from a 3rd party store.
There are a wide number of DAWs currently on the market but a small number of them dominate the music industry, and the one you choose can depend on a number of factors.

Apple’s Logic Pro X is a hugely popular option for bedroom production due to its incredibly intuitive user interface and competitive pricing at just $199.99. Logic Pro’s popularity could be credited to its similarity to the much cheaper ‘little brother’ software GarageBand. GarageBand is a great entry point to production however it is quickly outgrown and lacks the depth and scale that Logic Pro provides, hence why the transition is so common. Logic Pro has also long been the industry choice for film composers due to its high-quality mixing and mastering facilities. Overall Logic Pro is a sleek, shiny and relatively intuitive DAW that is capable of a lot more than it sometimes outwardly seems.
If a user interface isn’t something that excites you and a visual resemblance to Excel spreadsheet isn’t intimidating, then perhaps Ableton is the DAW for you. Ableton definitely takes longer to become familiar with, however it beats out Logic Pro in two definitive ways, the first being its availability on Windows alongside iOS, and the second being in live performance. Ableton has a live performance mode that is far ahead of the Logic Pro equivalent, the aforementioned grid based interface is perfectly suited for executing a killer live set. There are a number of other differences that set Ableton aside and that could be credited as advantages over the competition however most of these come down to personal preference and what you want from your DAW.
The third DAW that rules the market is FL Studio. This is typically the favourite choice for hip hop producers and beatmakers, largely because of FL Studio’s non-linear workflow. In most DAWs your track begins at the left and ends at the right. Whilst this sentence-like structure works for many genres of music, when we consider the sample, looping and drum break based origins of hip hop production, it becomes clear that the linear workflow perhaps doesn’t best fit the genre. What is arguably more important than structure in beatmaking is complete and distinguishable sections or motifs that can be dropped into any order you see fit and the FL Studio workflow is perfectly suited to this style of production.
USB Audio Interface
This requires a lot less explanation, you have your DAW, now you need an interface. An audio interface converts audio signals from a microphone or a direct input (DI) from an instrument into a format that is compatible with your computer and DAW. Typically connected through your computer’s USB port, it also redirects the audio back to your headphones or studio monitor speakers.
Although the prices can vary dramatically, a mid-level audio interface from a reliable brand like Behringer, Focusrite or Rode will definitely be sufficient for a beginner all the way to an intermediate producer.
Midi Keyboard
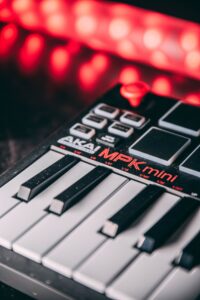 Having all the synthesisers and instrument presets available is all well and good, but now you need the means by which to play them. And although a midi keyboard isn’t your only option to do so, it’s definitely the best. Most DAWs have a feature to use your computer’s keyboard as a virtual piano, but this should never be your first choice but more of a convenient backup option. You can also programme your notes but this risks the music sounding robotic and too quantised at times. So that leaves the midi keyboard, ranging in sizes and functionality, this convenient micro keyboard plugs in via USB and with no set up required brings your DAWs instrument library to life.
The most commonly used midi keyboard (and an all round great starting option) is most likely the AKAI Professional MPK Mini MK3, due to its highly competitive pricing and general reliability.
Microphone
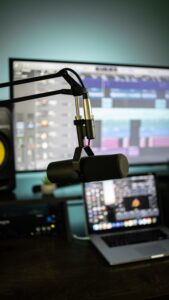 Whether you’re recording vocals, live instruments or even just room ambience, a good microphone is a staple of any production setup. There are two main types of readily available microphones; dynamic mics and condenser mics. The one you choose depends entirely on what you plan to record.
If you want to record drumming, really loud vocals, or you want to mic up an amp, you’ll need a dynamic mic. These microphones are the best for recording loud sound, the obvious trade off here is that they don’t deal well with more sensitive sounds. They’re also much cheaper than condenser mics and don’t require a power source.
If you want a more accurate and complex recording of your vocals then opt for a condenser mic, although more expensive, they more than justify the higher price tag with a much wider range of frequencies being able to be captured effectively. Just make sure your device supports phantom power otherwise you’ll need to pick up a power supply.
Sound Dampening Equipment
 Although there is a charm to the lofi sound, you definitely need the ability to remove background ambient noises when you choose. There are a number of ways to remove annoying sounds in your DAW after a recording, but the easiest and most effective way is always to create a dampened recording environment as best as possible.
There are many microphone reflection filters and sound shields available for a good price online, these are a great addition to your arsenal but there are more steps you can take to ensure a crisp and echoless recording. Try to record in the smallest part of the room with the microphone facing as close to the surface behind you as possible. If possible, cover that surface and any other surrounding surfaces with an insulator (clothes or blankets do the job). Having a rug on the floor of the room is also a great and easy way to minimise noise reverberations. And finally, use a pop shield. This will soften any hard syllables and reduce popping sounds that are caused by fast moving air firing into the microphone.
Just like any hobby, the more advanced you become, the more your need for equipment will increase. Part of the joy of production is getting your hands on all manner of new audio toys to play with, but these 5 essentials will get you up and running and pave the way for that progression. Happy producing!


