

Welcome to the first part of this Adobe Premiere Pro for Beginners tutorial. If you know nothing about Adobe Premiere Pro and you want to learn how to edit on this software, you’ve come to the right place. The aim of this tutorial is to teach you editing on Adobe Premiere, from scratch. Thus, during this first part, you’ll learn about how to create your project, the workspace interface and the basic editing tools. So, without further ado, let’s get started6!
Creating your project
When you open Premiere Pro, there are two options before really digging into the editing.
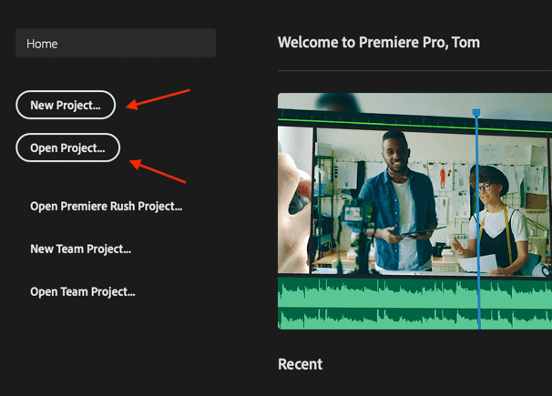
By clicking on Open Project, you’ll have to choose a preexisting Premiere Pro project. There are 3 types of file that can be opened that way: .prel; .prproj; .xml. You will mainly use .prproj files, that is to say Premier Pro projects you’ve saved on your computer.
Now if you click on New Project, this window will pop up.
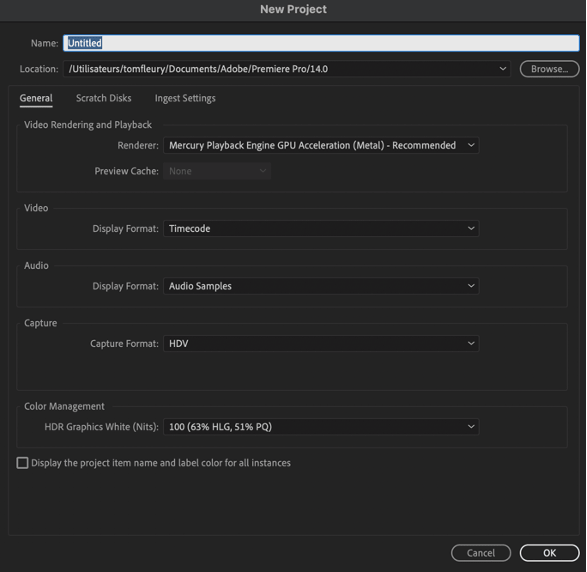
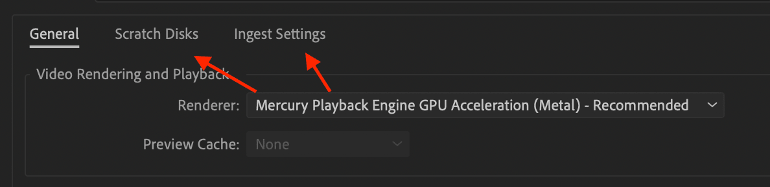
There are a lot of information there, but actually you will ignore most of them. In particular, you shouldn’t care about the Scratch Disks and Ingest Settings panels. Letting them on their default settings is fine.
General Settings
Now, the General section is more interesting.
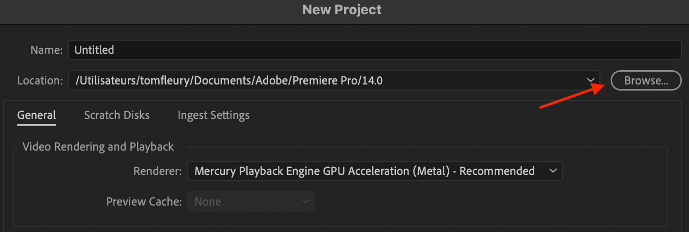
The Location option is important. Clicking on Browse… will invite you to choose the location where you want to save your Premiere Pro project. You can always change it later, but you might as well do it right now.
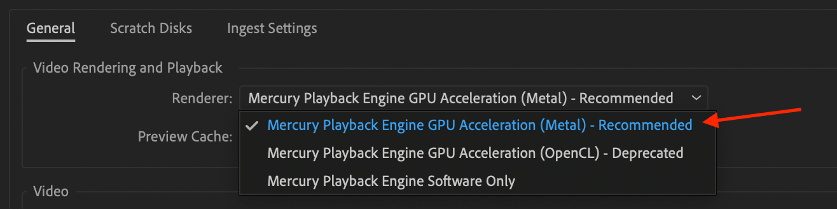
Then in the Video Rendering section, you will choose the renderer for your project. That means the renderer that will process GPU-accelerated effects and playback. Basically, it means you choose the computing engine that will allow you to have a playback in real time without having to render your work. In that case too, the default setting is often the best and you shouldn’t change it.

Then, there are 4 other settings you should pay attention to. If you’re planning to edit a regular video project, just skip the following explanation. The default settings are almost perfectly fine for any video project.
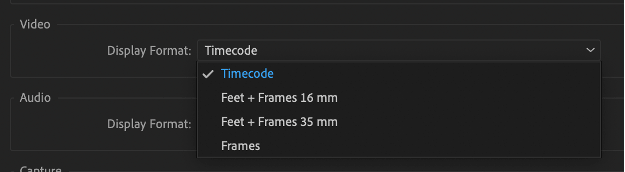
The Display Format only changes the way the length of the video is measured. As we said, for almost all project, Timecode, the universal standard, should be selected. The two following options are made for film footages. Indeed, film can be measured in feet and frames, and the metering changes depending on the type of film used, either 16mm or 35mm. Lastly, the Frames option will measure the number of frames.
Then there are two options when it comes to the display format of the audio.

By choosing Audio Samples, time will be displayed in hours, minutes, seconds and samples (snapshots of an audio, at very shot intervals). If you choose Milliseconds, time will be displayed in hours, minutes, seconds and milliseconds.

This option only matters if you’re capturing a video stream through the FireWire connection of your computer.
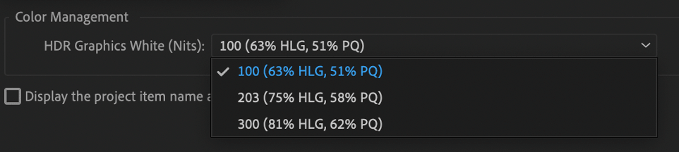
This section deals with the high dynamic range parameters of your project. If you weren’t told otherwise, you should choose the first option. And as a beginner on Premiere Pro, you should not pay attention to this.
You can finally press okay to create your project.
Workspace interface
You now see the Premiere Pro workspace. It’s split in 4 main panels.
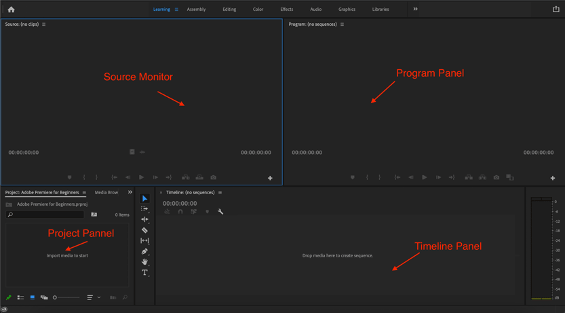
Timeline Panel is where you’ll place your sequence and edit your clips and audio together.
Project Panel contains all the items you’ll want to use for your project (video clips, audio, titles…).
Source monitor is where you’ll see a preview of your clips at full resolution.
Program Panel is where you’ll be able to see a preview of your edited sequence.
Next to the title of each panel you’ll can click on the Panel menu which will show you several options regarding the panel in question. By clicking on a specific panel, it’s outline will turn blue. That means the panel in question is active.
That’s the default workspace organization but don’t forget that all panels are available in the window tab.
Importing Media
What you need to do now is importing media in your Project Panel. You can do that by just dragging your media in the Project Panel.
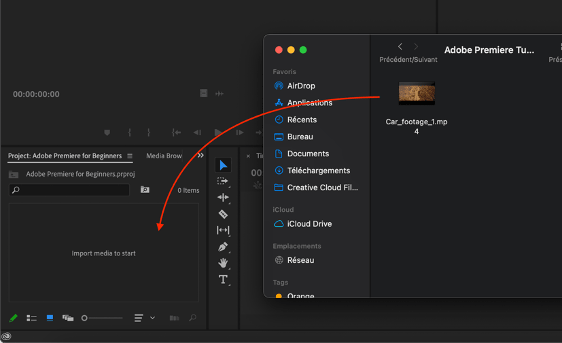
But the other way is to click on the Media Browser section of the Project Panel.

That way, you’ll be able to go through your footages and get a preview of those shots on the Source Monitor by double-clicking on them. Once you choose the files you want to import you can right click and press Import.
Once you’ve done this, your file will appear in the Project Panel.
There, you can create Bins to organize your footage. That’s important when you’ll start to work with a lot of footages. Putting your media in those folders will help you see clearer among your clips, audio, etc.
Creating your sequence
Now that we’ve seen how the Project Panel and Source Monitor works, let’s get into the Timeline Panel. The Timeline Panel is where you’re going to edit your sequences. To create a sequence, simply drag the files from the Project Panel to the Timeline Panel.
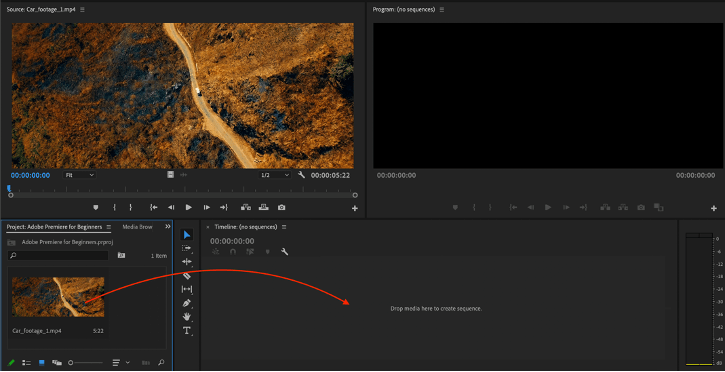
Once you’ve dragged the file on the Timeline Panel, a sequence will automatically be created.
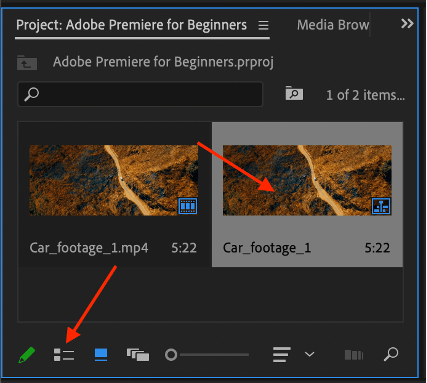
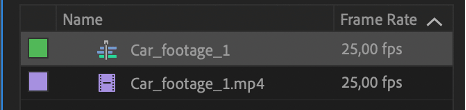
If you go to List View, you’ll maybe see clearer the difference of icon and color between the clip and the actual sequence. On the following image, our sequence is in green and the initial clip in purple.
Now, let’s see how the Timeline Panel is divided.
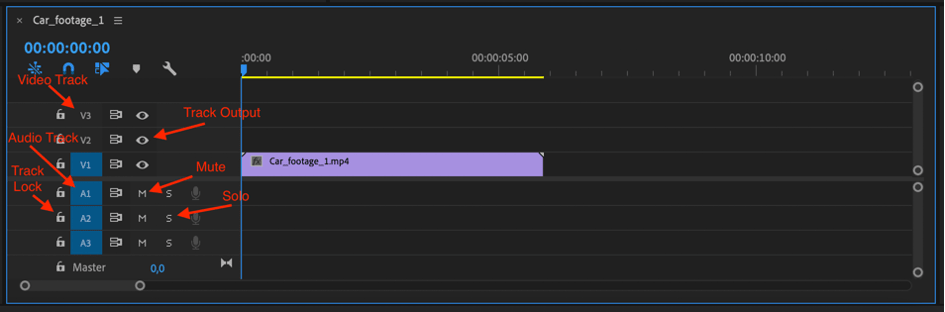
Video Track: The upper side of the Timeline is where you’ll place your video file.
Audio Track: The under part of the Timeline is where the corresponding audio file of the clip used on the video track will appear (both being obviously synced).
Track Output: by clicking on the eye icon, you won’t be able to see the video on that track on the Program Panel. But the file will actually still be there. You can see it as a mute button but for video.
Track Lock: by activating the Track Lock, you won’t be able to move or edit anything to the corresponding track.
Mute and Solo only concern the audio track and their names are self explanatory.
Basic editing tools: Selection, Razor Tool
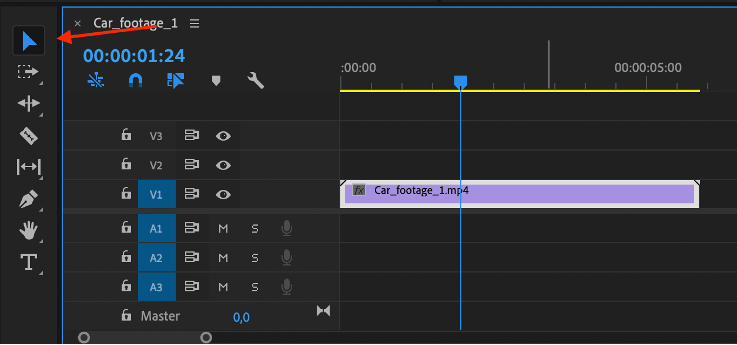
Now let’s look at the basic editing tools. The first most important and basic tool is the Selection Tool. You can use it by clicking on the mouse pointer icon. But you might want to use the shortcut V, which is very useful and will save you time.
This tool will allow you to move your clip or audio as you like on the timeline.
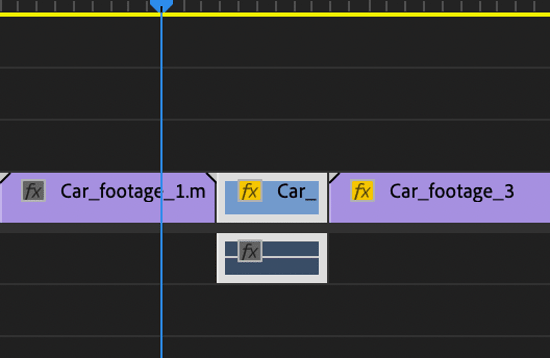
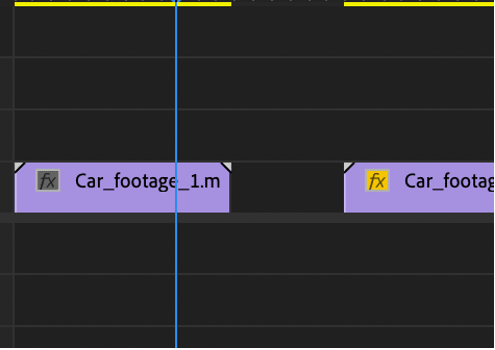
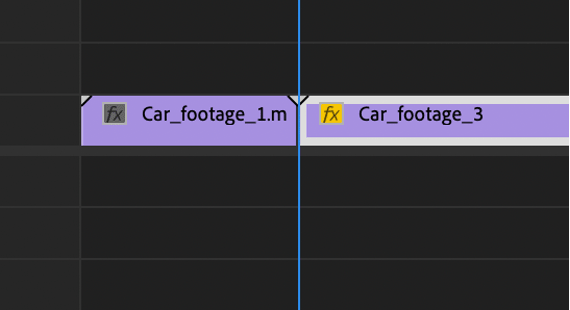
The second tool you’ll use often is the Razor Tool which allow you to cut a file (clip or audio). You can select that tool by clicking on the razor blade icon. But once again, you’ll most probably only use the shortcut C. To use that tool, place the Razor Tool where you want to cut your file. Then by clicking, the file in question will be cut in half on the line that appeared next to the Razor Tool icon.
Basic editing tools: Adjusting the length, deleting files
If you want to adjust the length of your file, instead of cutting the file and then deleting the part you don’t want to use, you can simply adjust the length by clicking and holding the edge of the file. As you place your mouse cursor over the edge of your file, you’ll see that it becomes a red arrow icon. And obviously, when the arrow is pointing inwards of the file, it will reduce its length. And if the arrow is pointing outwards of the file, it will allow you to extend it.
If you want to delete a file, you can right click on the file and press Cut. But the more natural way to do is just selecting your file and press the Delete button of your keyboard.
If you do that, the file in question will disappear, leaving a space in between the other clips.
But there is another delete option that will leave no such space. By doing Option/shift + Delete, the clip following the deleted one will automatically move right next to the clip that preceded the deleted one.
When it comes to video clips that have audio (they appear in blue), you’ll see that as you’re moving them on the Timeline, both the video and audio track are moving. If you want to move the video track or the audio track only, then right clip on the file, and do Unlink.
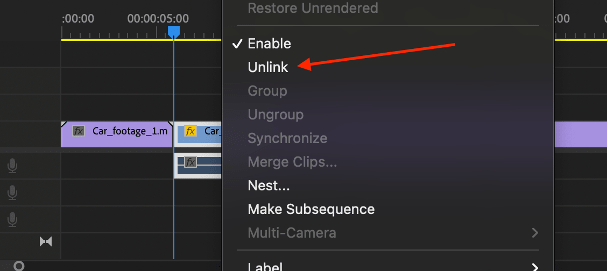
That way the video and audio tracks won’t be linked anymore, and you will be able to move them separately.
Now, you know how to create your Premiere Pro project, you’re more familiar with the workspace interface and know the basic editing tools. And that’s already a lot! We’ll go more in details in the next part of this Adobe Premiere Pro for Beginners tutorial. In the meantime, you can check our 10 video editing hacks article!


